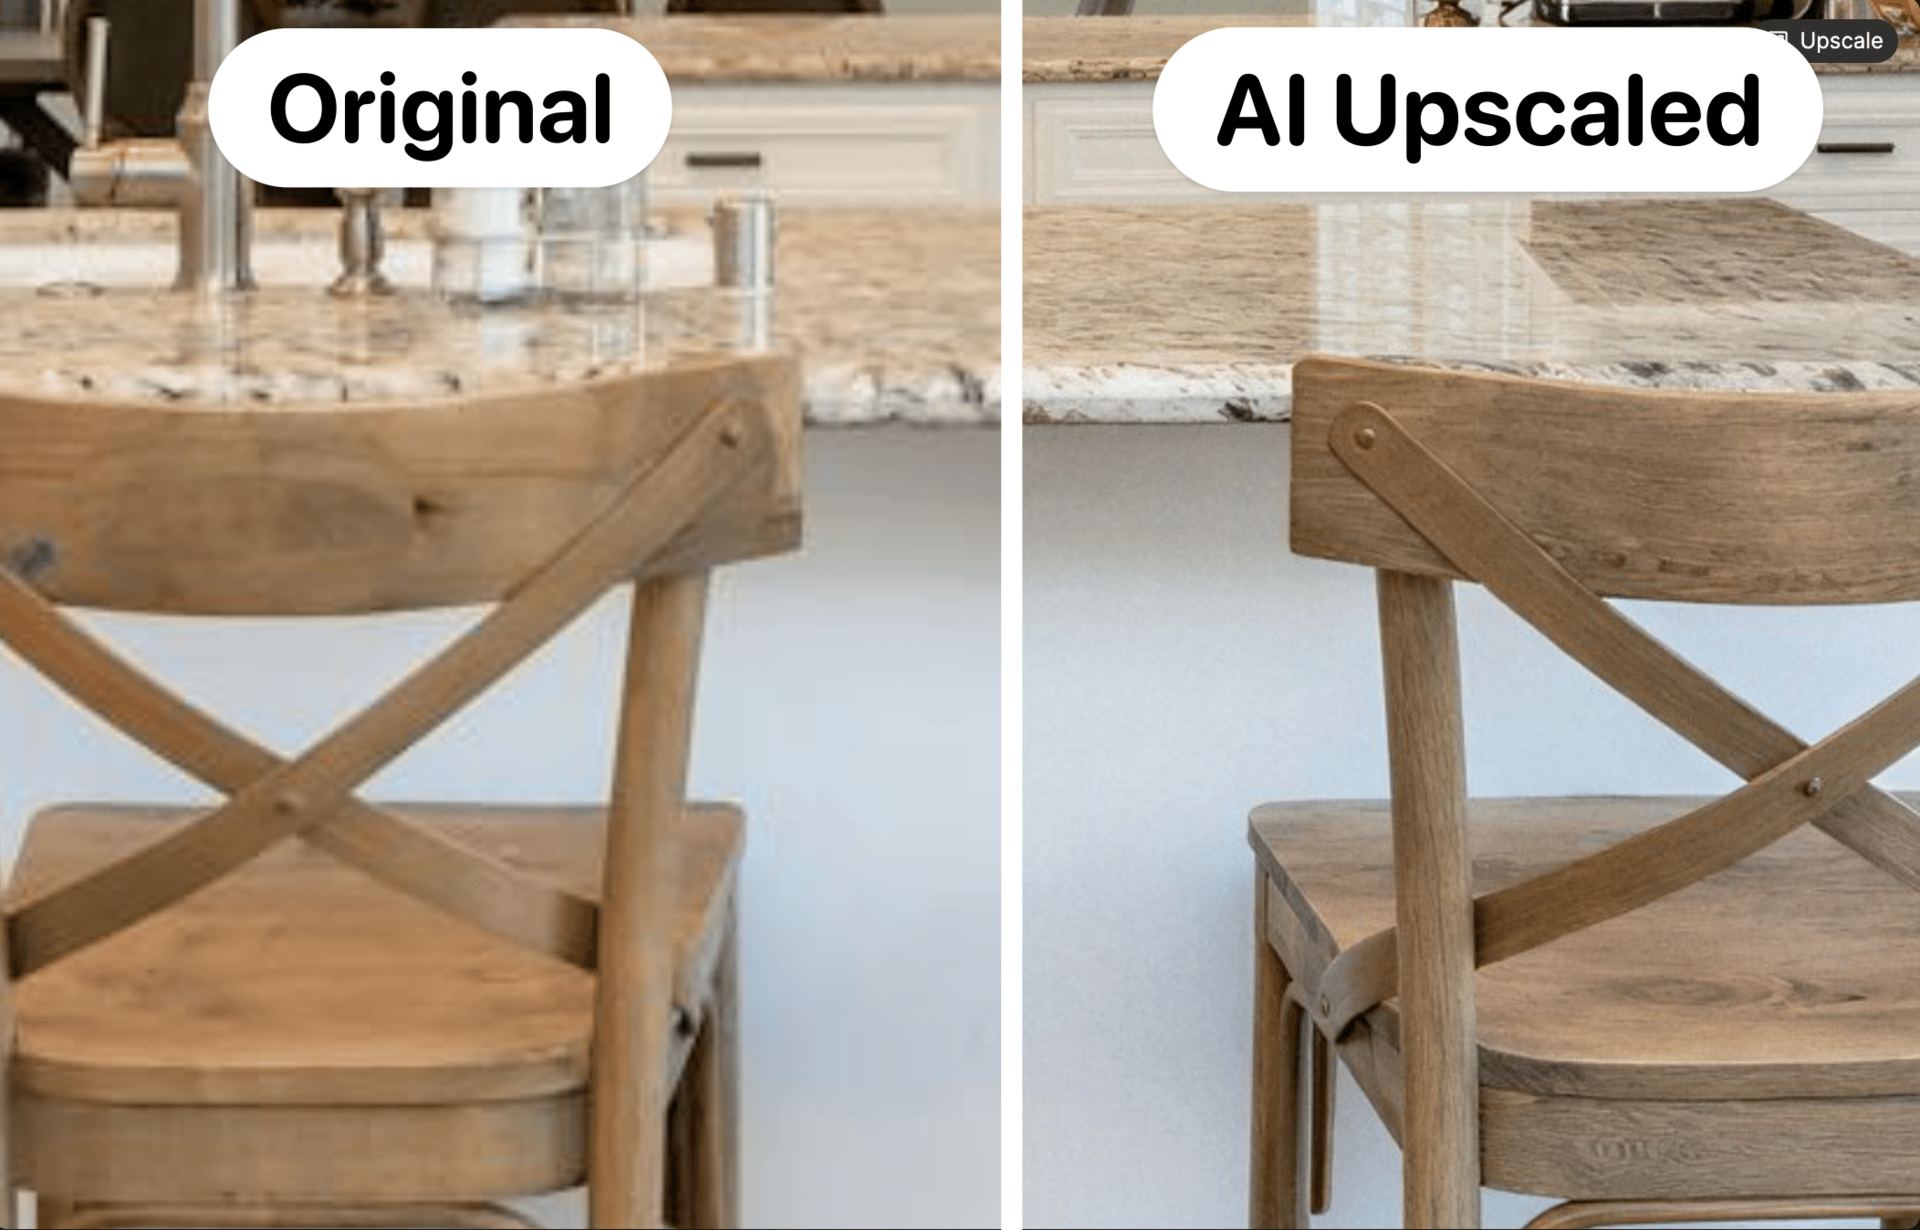
Turn standard interior design images into ultra-high-resolution visuals with enhanced details and realism using Magnific AI. Then animate your upscaled images into realistic video walkthroughs with Google’s VEO 3.1.
Here's a comparison of before and after the upscaling.
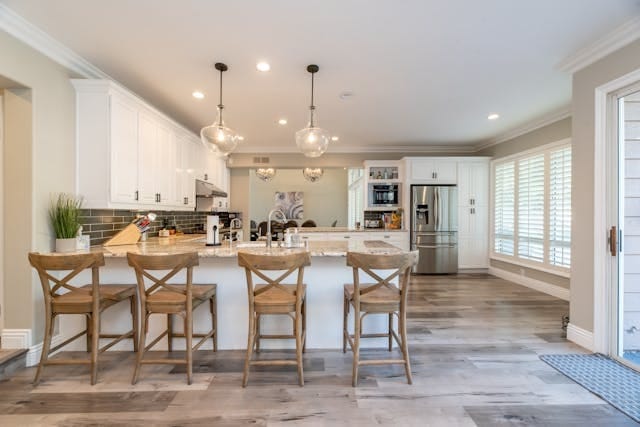
Original small 640 × 427 interior image
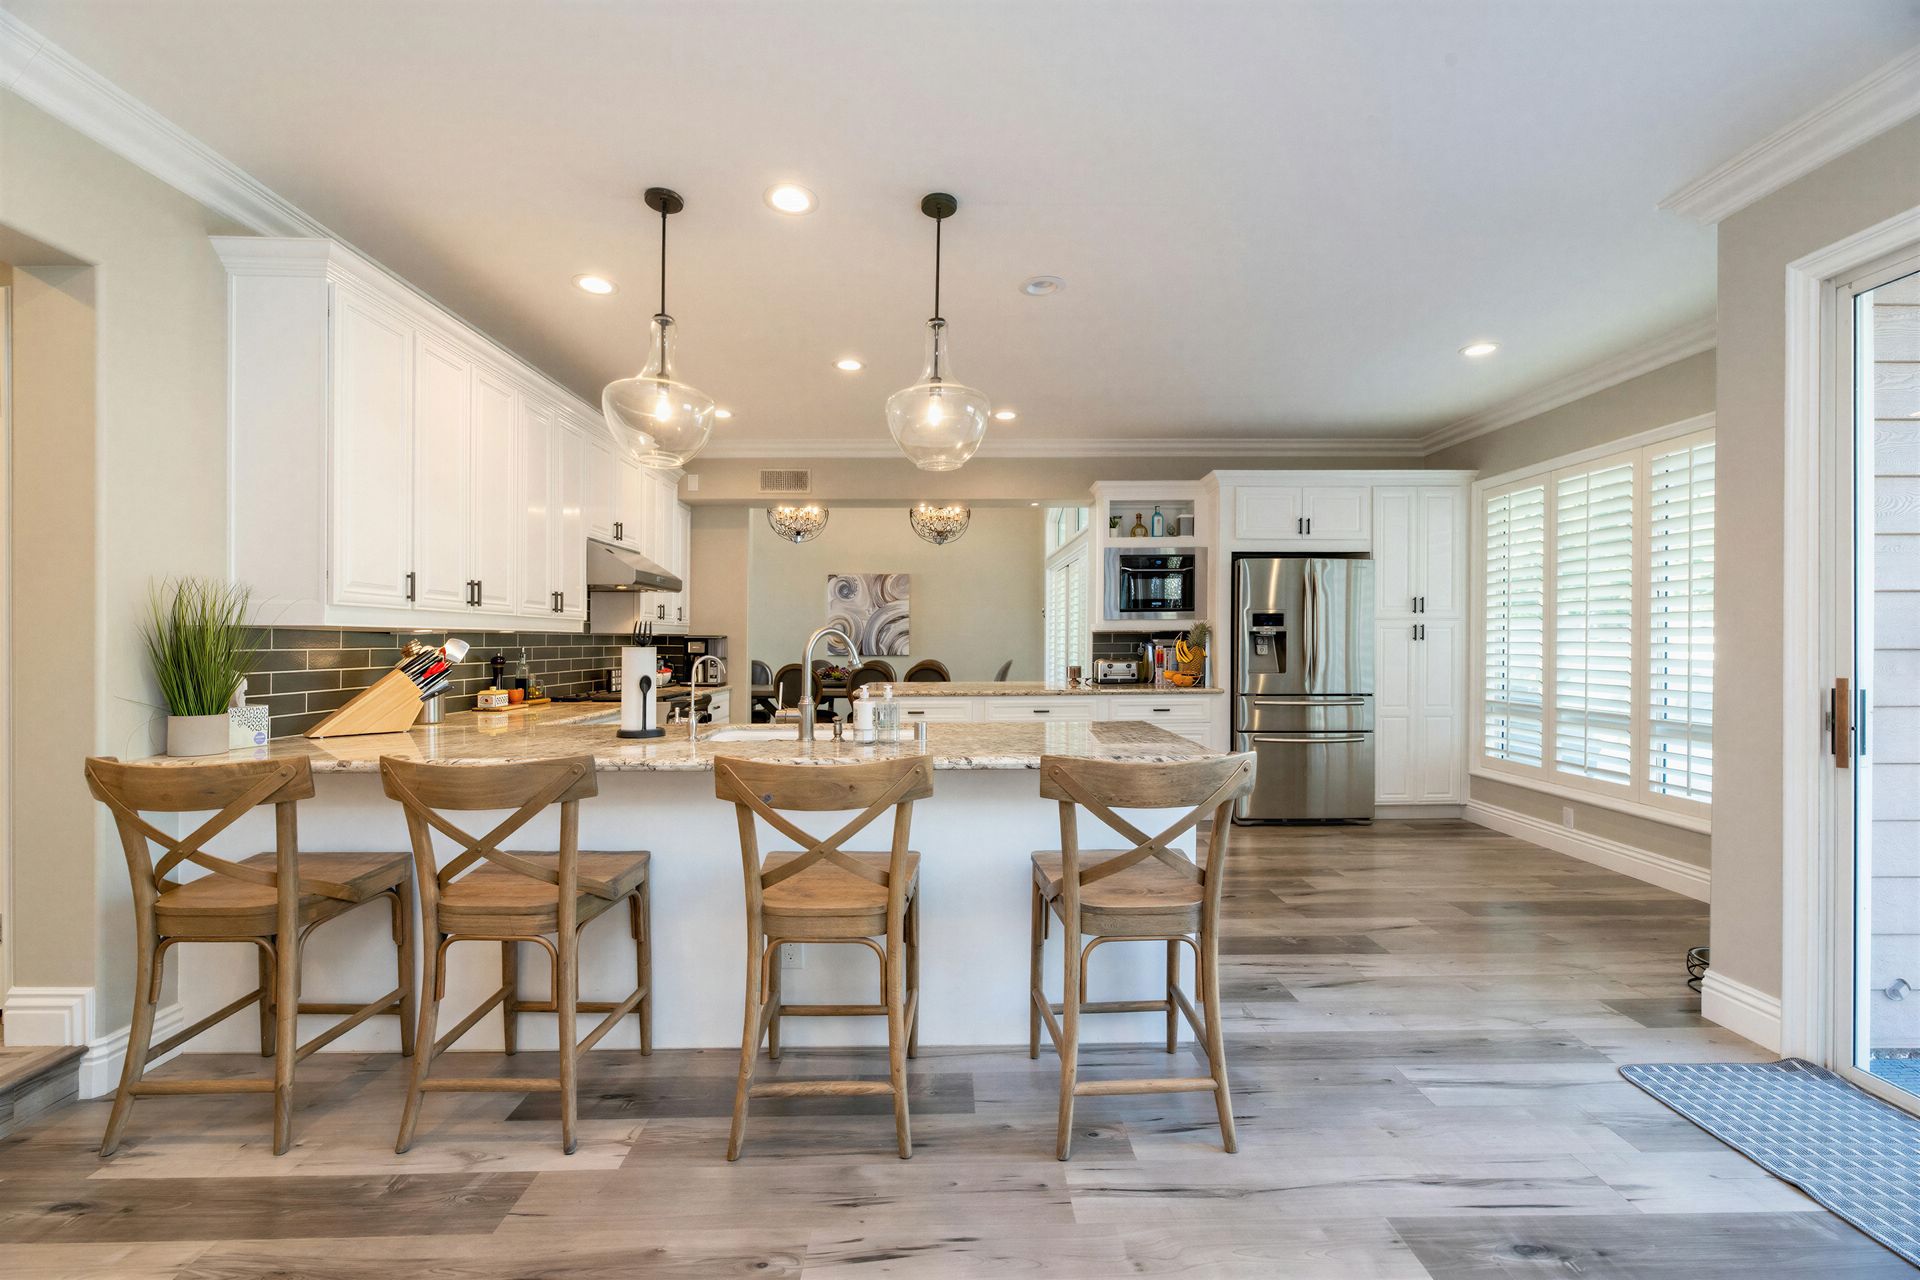
AI Upscaled 3840 × 2560 image
What You'll Need
Magnific AI account or access through a creative platform (I personally use Freepik so all images are taken from there)
An interior design image (photo or AI-generated)
Optional: Google Gemini AI account with VEO 3.1 access
Step 1: Prepare Your Interior Design Image

Start with your source image. This can be:
A photograph of an actual space
An AI-generated interior design render
A 3D visualisation from design software
For best results, use images that are already reasonably high quality. The AI will enhance details, not create them from nothing.
Step 2: Upload to Magnific AI
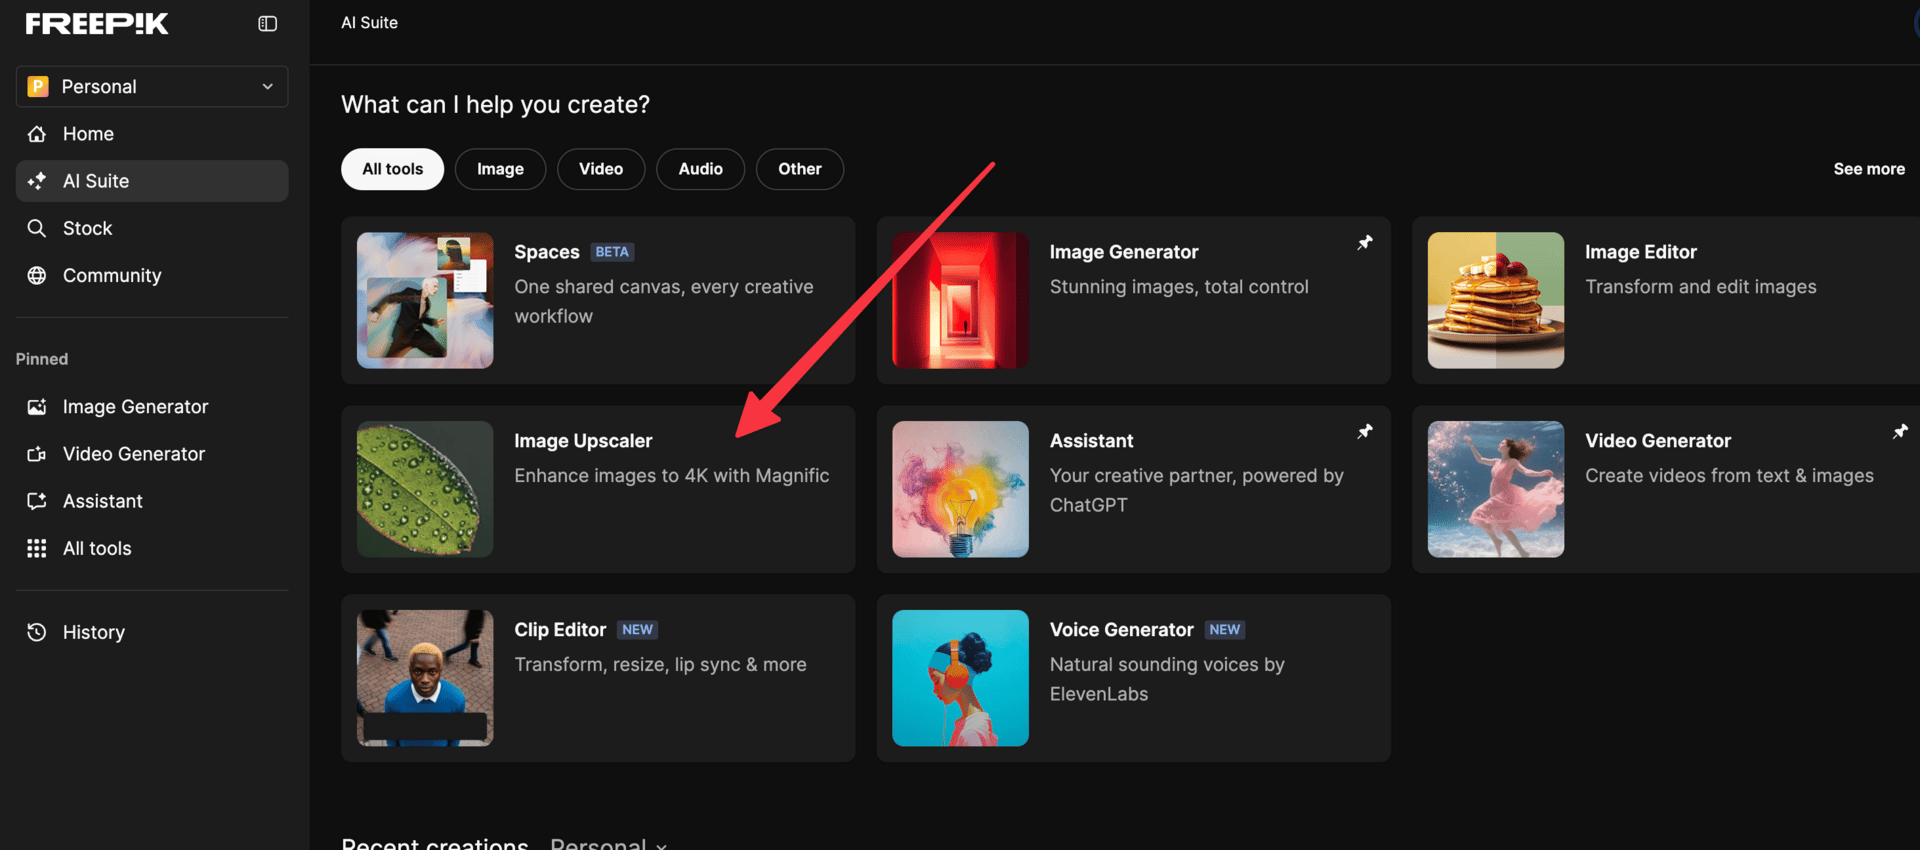
Navigate to Magnific AI and log into your account. In Freepik under AI suite click Image Upscaler.
Select the new Precision mode and click Upload Image and select your interior design image.
Step 3: Configure Upscale Settings
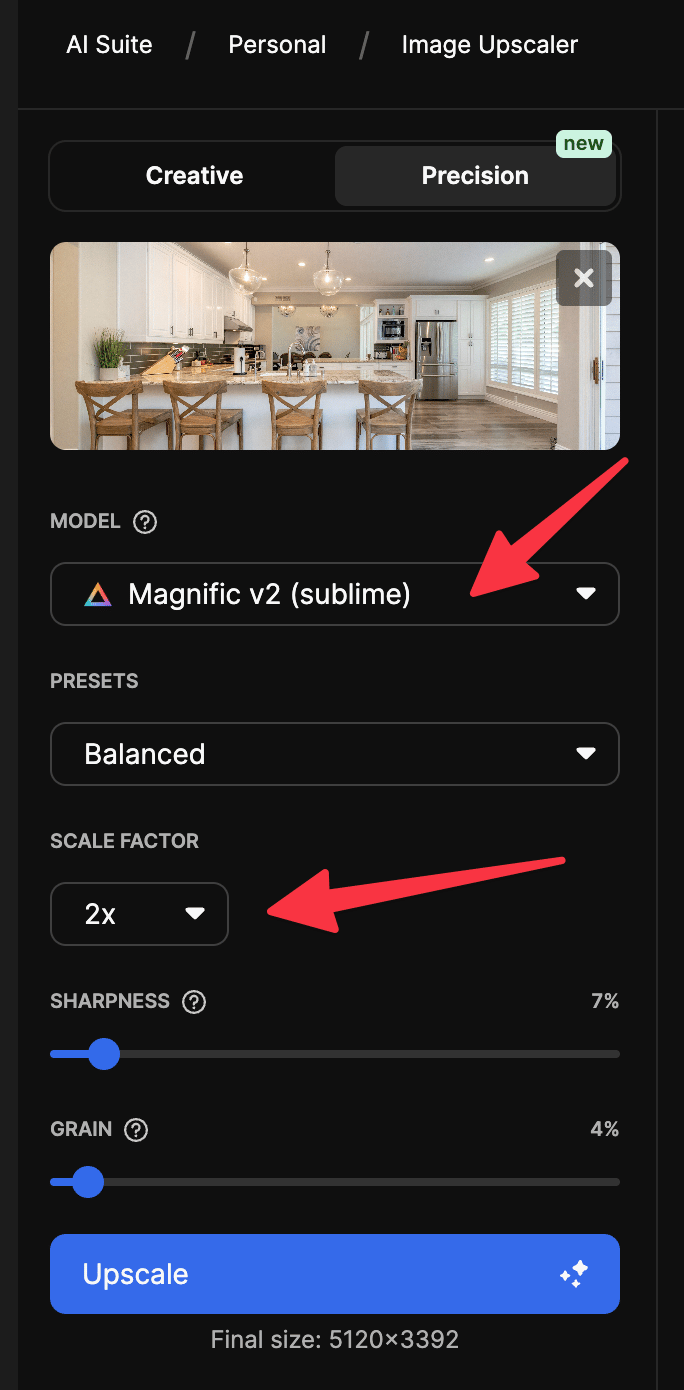
Within precision model select the (sublime model). Choose your scale factor. And adjust the sharpness and grain depending on you original photo. You can leave the default numbers if uncertain.
Alternatively you can use the creative upscaler if you don’t need exact image precision. For example AI images that can be slightly different. If it is a real interior photo you need exactly the same choose the precision model.
The following are settings you can use mainly in the creative upscaler but some apply to the precision model as well.
Scale Factor: Choose how much to upscale your image
2x for moderate enhancement
4x for significant detail improvement
8x or 16x for maximum resolution (requires higher tier subscription)
Creativity Slider: Controls how much AI interpretation to apply
Low (0.1-0.3): Stays closer to original, minimal reinterpretation
Medium (0.4-0.6): Balanced enhancement and creativity
High (0.7-1.0): More AI-driven detail generation
For interior design work, a creativity setting of 0.3 to 0.5 typically works best to maintain architectural accuracy whilst enhancing textures.
HDR Slider: Adjusts dynamic range
Keep between 0 and 3 for natural-looking interiors
Higher values can create overly dramatic lighting
Resemblance Slider: Controls how closely the output matches the input
Higher values (80-100%): Stays very close to original
Lower values: Allows more creative interpretation
For professional interior design work, set resemblance to 75-85%.
Step 4: Add an Optional Prompt
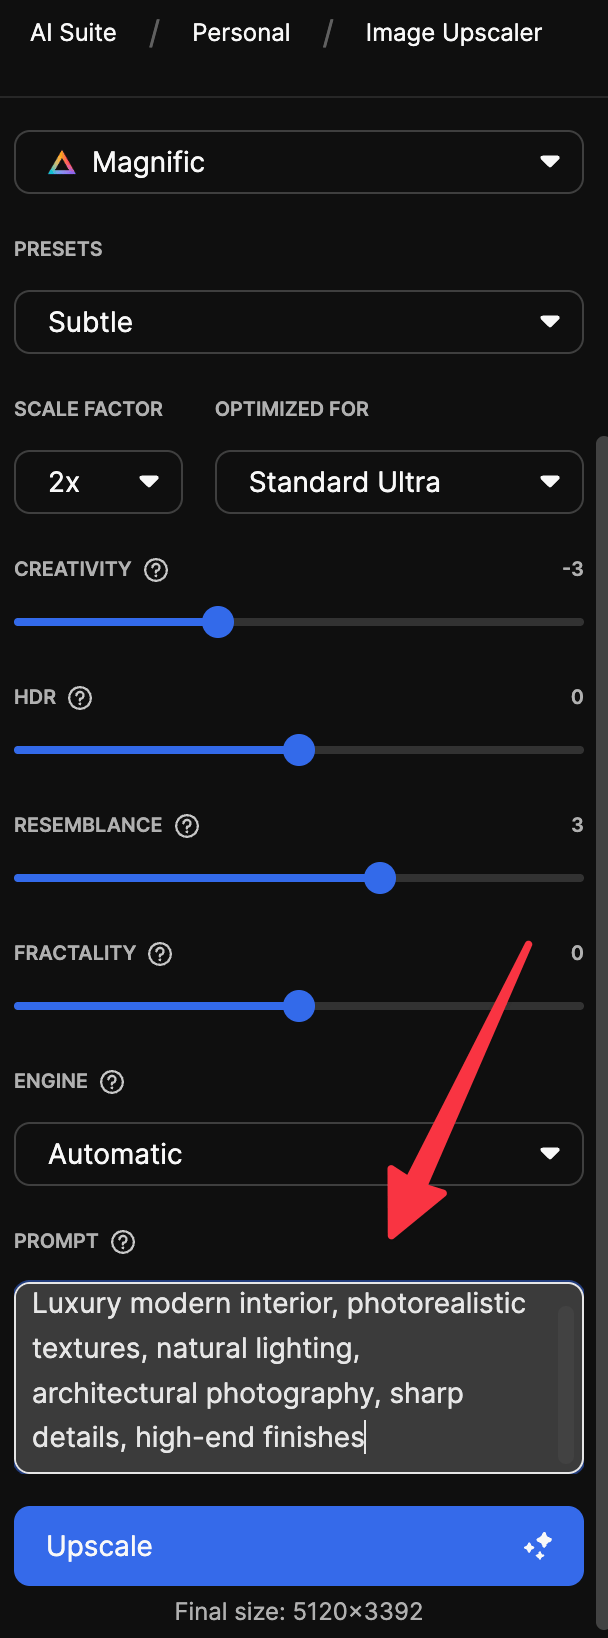
Magnific AI allows you to guide the upscaling with a text prompt (in creative upscaler). This is particularly useful for interior design images. If you are using the precision upscaler you can skip this step.
Here is an example prompt you can use and tweak.
Luxury modern interior, photorealistic textures, natural lighting, architectural photography, sharp details, high-end finishesCustomisation: Adjust the prompt based on your design style. For example: "Scandinavian minimalist interior" or "Industrial loft space with exposed brick"
Step 5: Generate the Upscaled Image
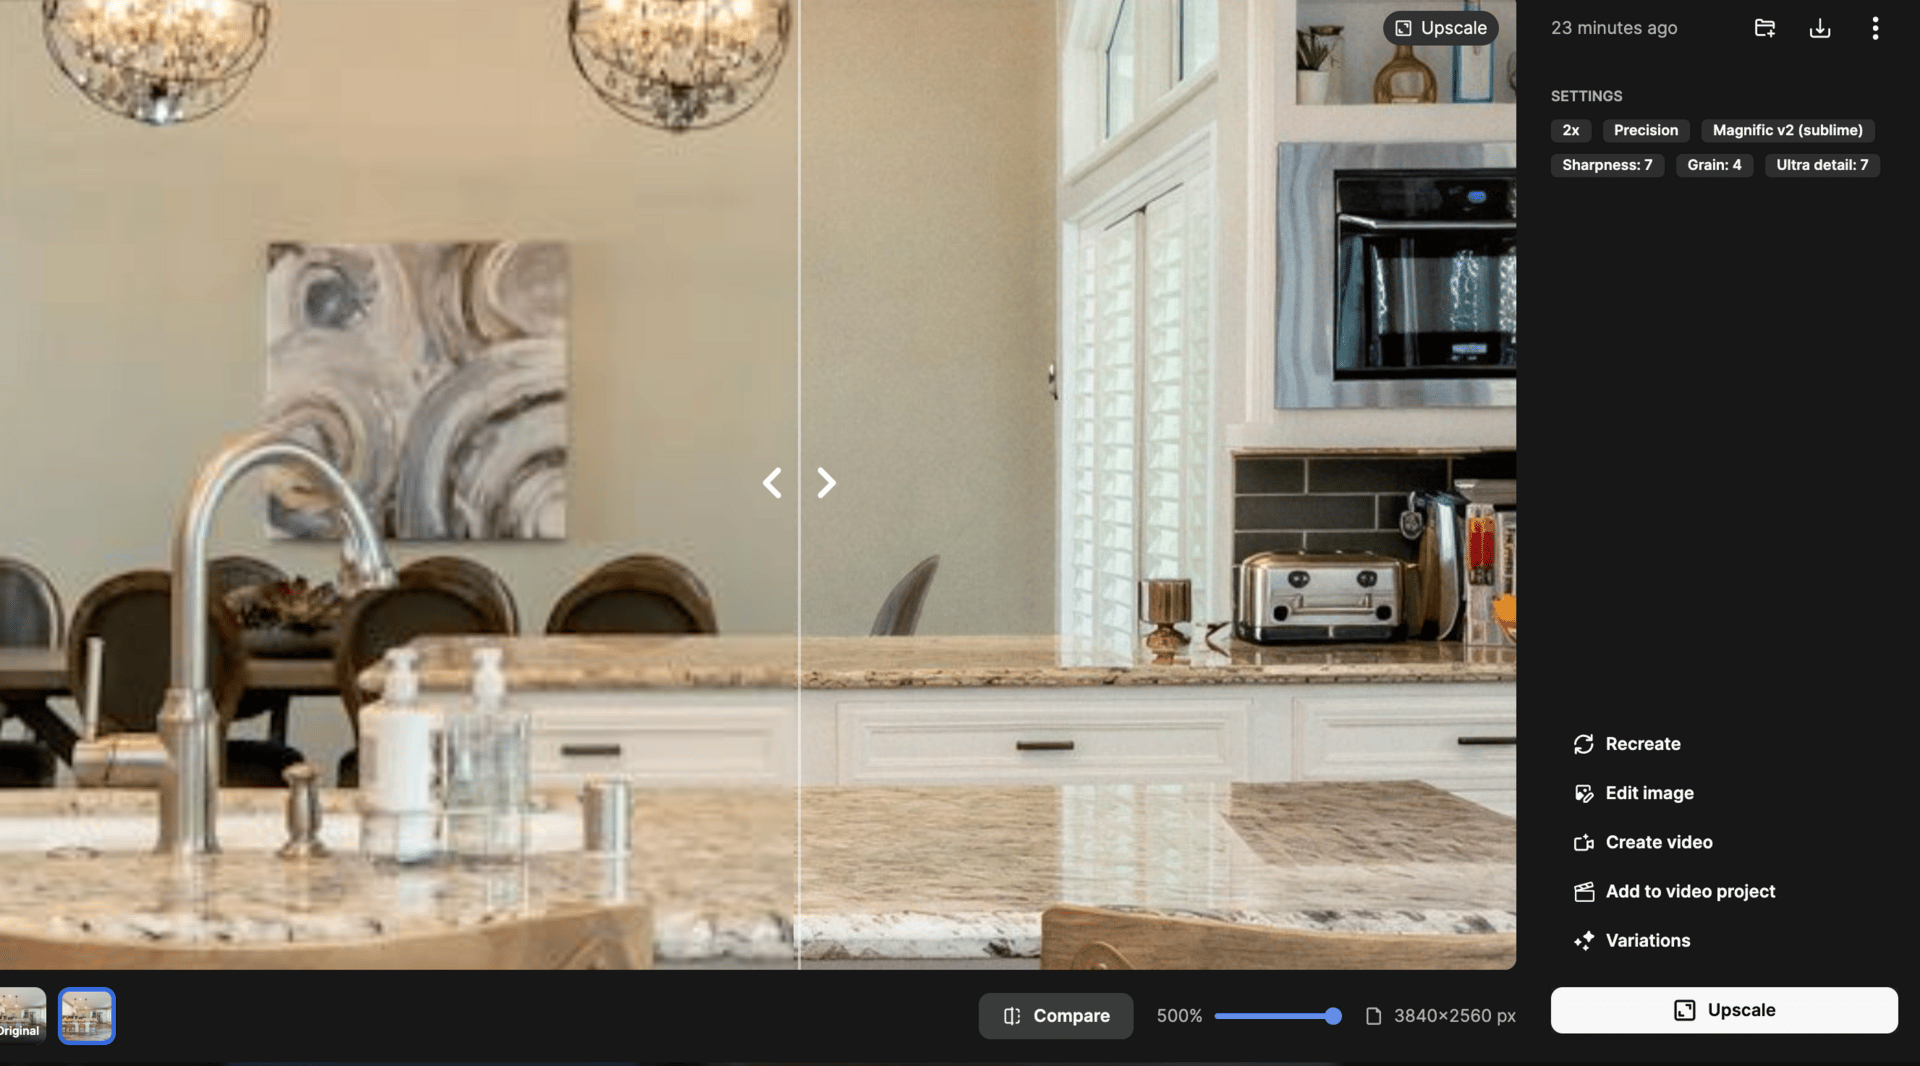
Click Generate and wait whilst Magnific AI processes your image.
Processing time varies based on:
Image size and scale factor
Current server load
Your subscription tier
Expect 30 seconds to 2 minutes for most upscales. In Freepilk the amount of credits required depends on original image size and the size of output. Expect 108-1000+ credits per upscale.
Step 6: Review and Download
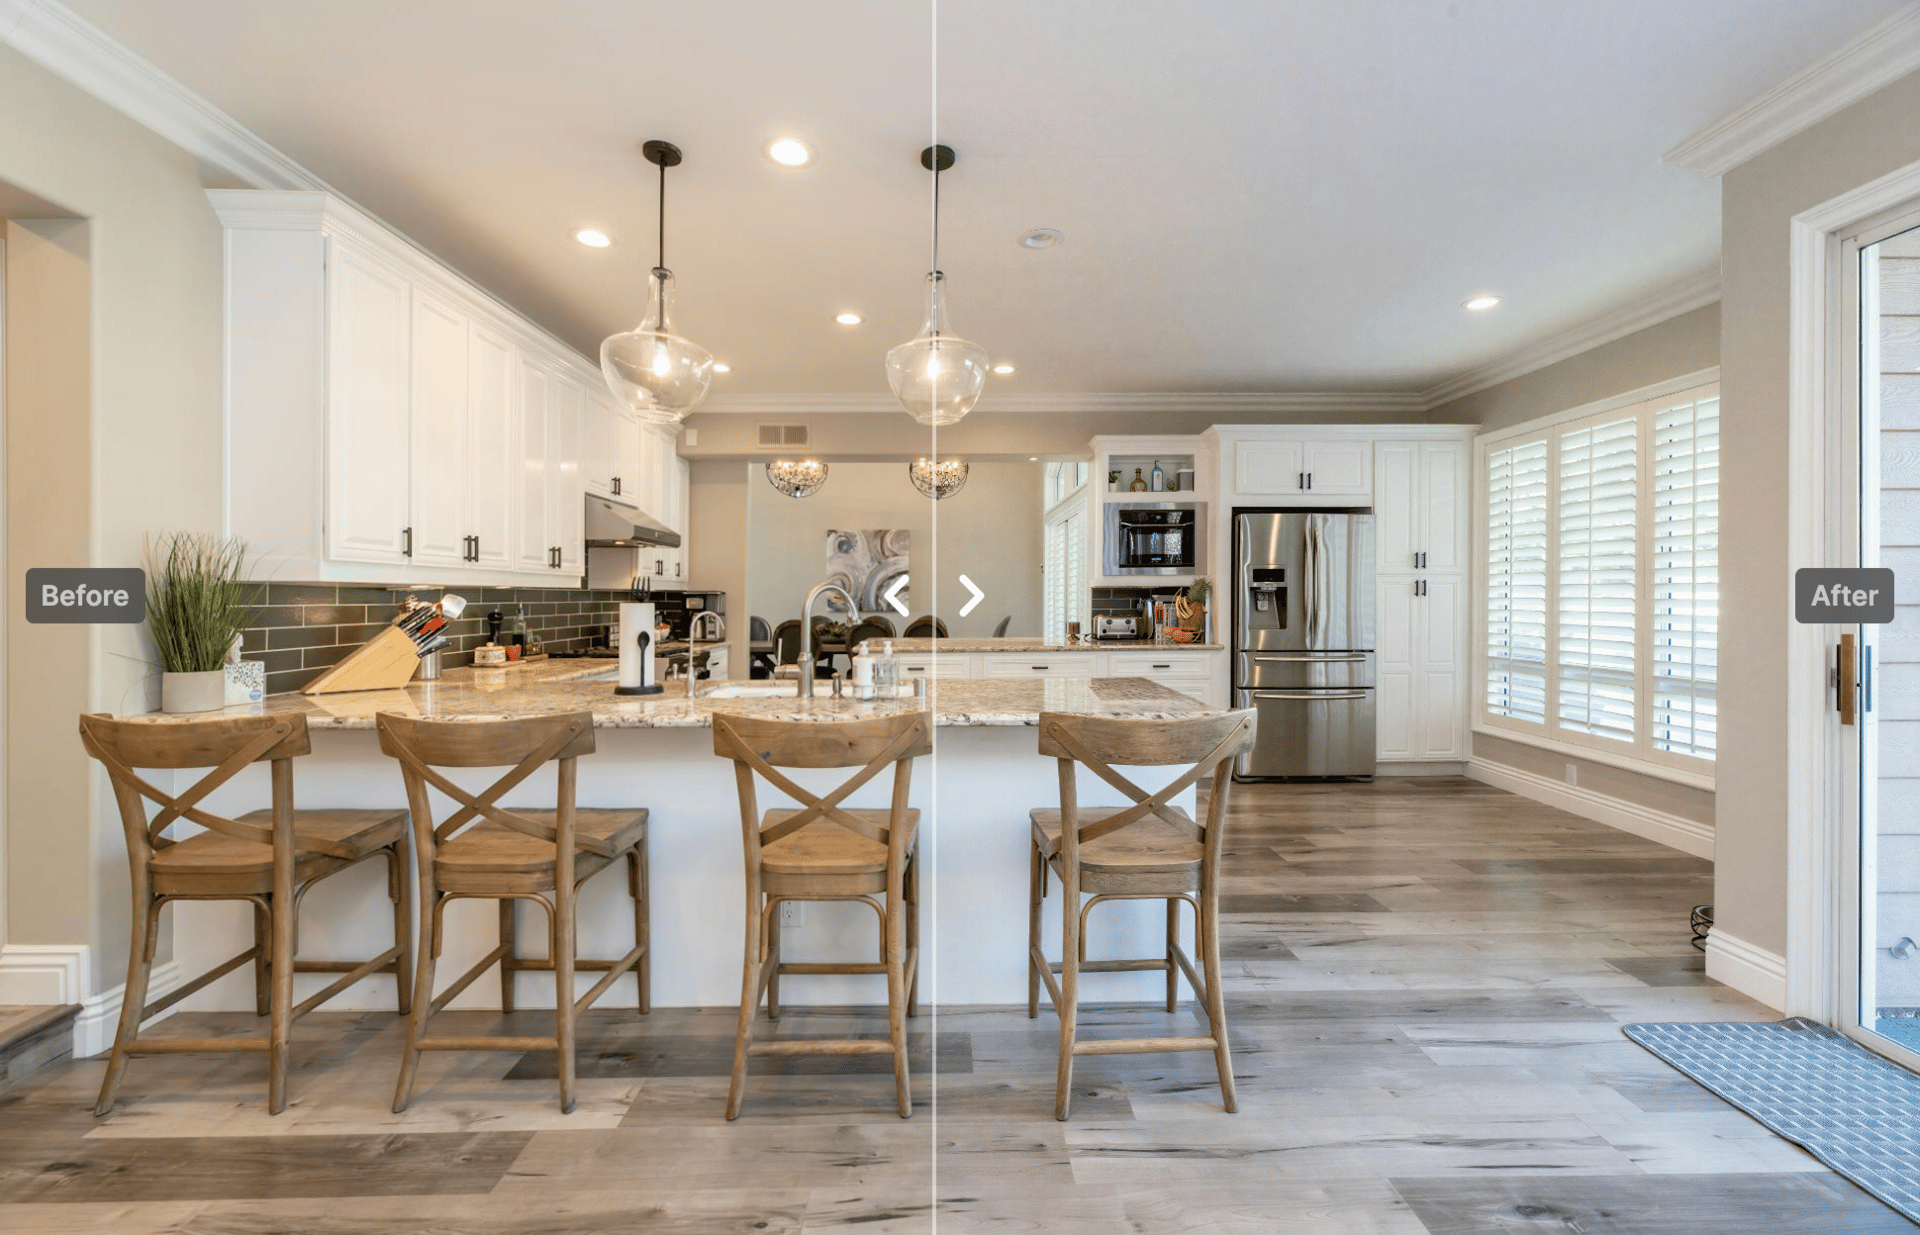
Once processing completes, compare the original and upscaled versions side by side.
Check these elements:
Textures: Fabrics, wood grain, stone patterns should look enhanced but natural
Lighting: Reflections and shadows should remain consistent
Architectural accuracy: Walls, corners, and proportions should stay true to the original
Fine details: Light fixtures, furniture details, decorative elements
If you're not satisfied, adjust your settings and regenerate:
Reduce creativity if details look too invented
Increase HDR if lighting feels flat
Refine your prompt for better guidance
Download your final upscaled image in PNG or JPEG format.
Note: I’ve found Magnific AI to be one of the best image upscalers, but images may have unwanted artefacts and be 100% perfect. Outputs will depend on original size/quality and the size you are upscaling too. If required further AI image editing can be used to remove or add artefacts.
Optional: Create a Video Walkthrough With VEO 3.1
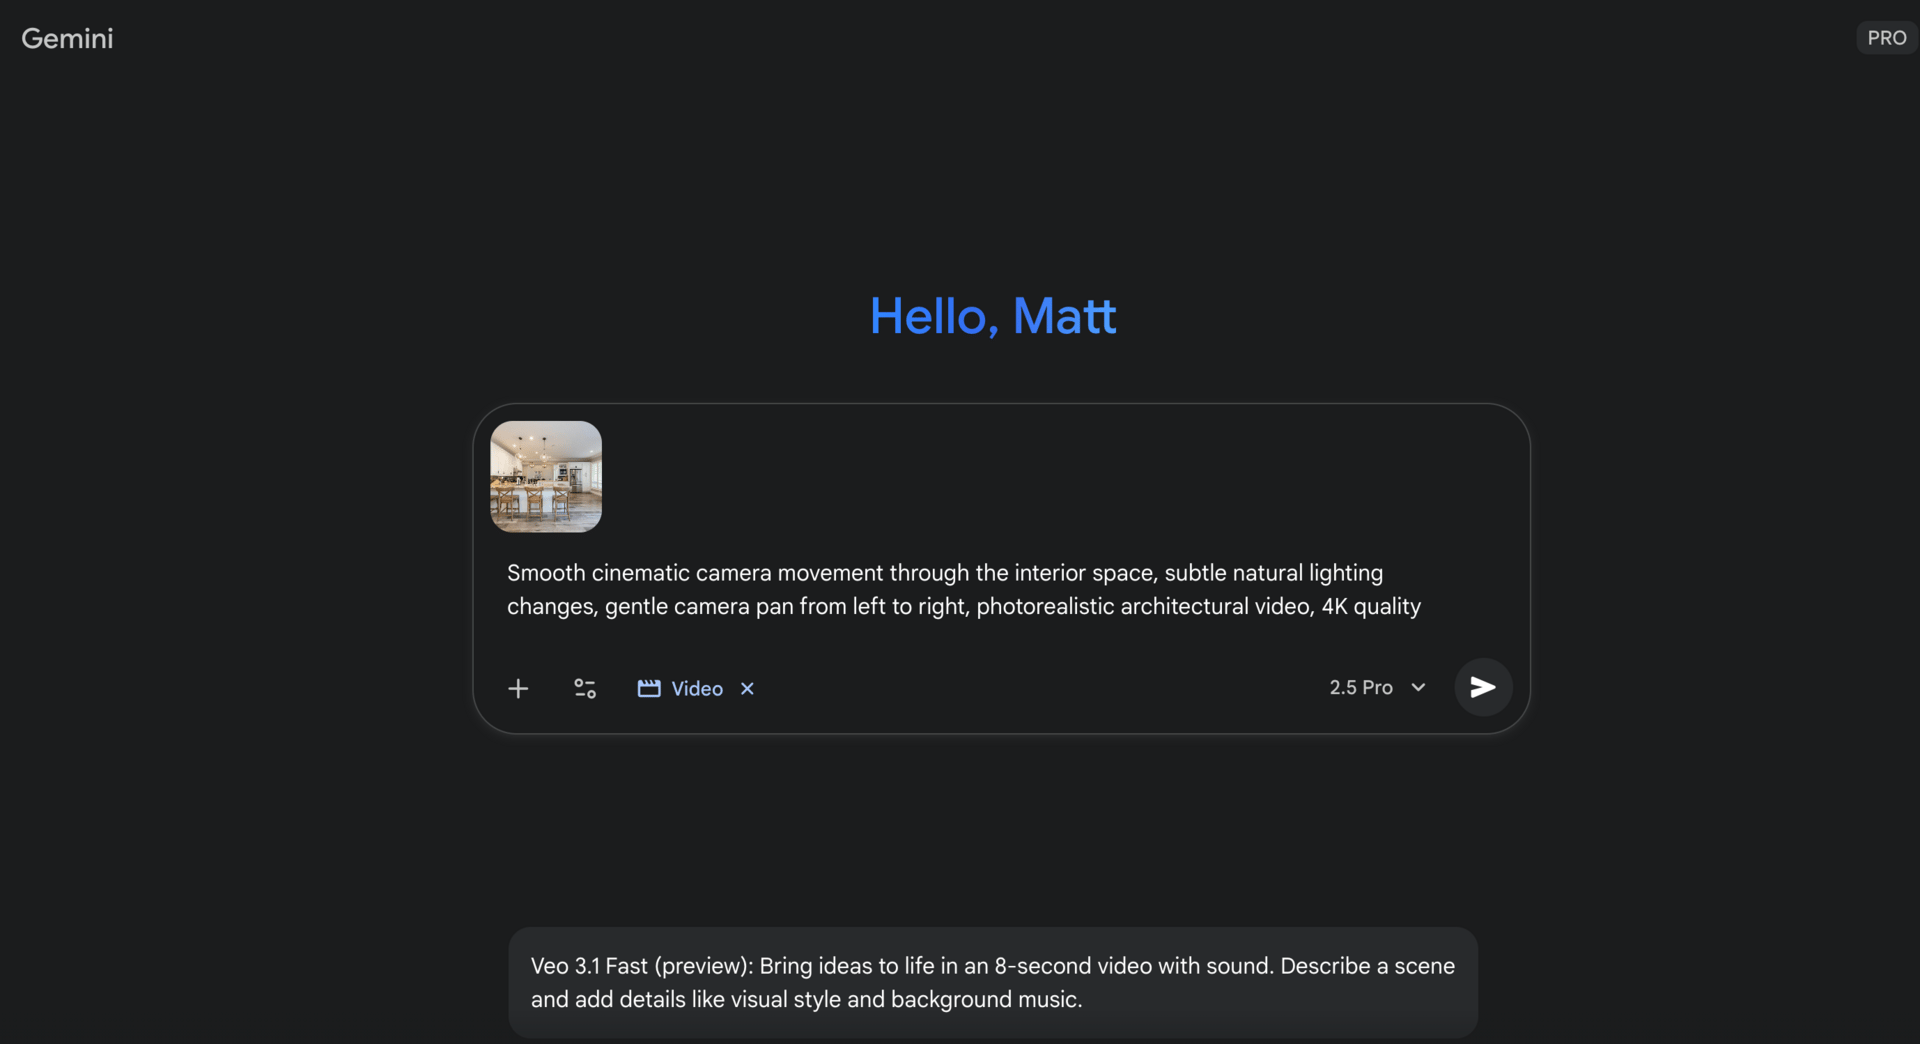
Want to bring your static interior image to life? Google’s VEO 3.1 can transform your upscaled image into a realistic video.
Step 1: Visit Gemini and ensure you have access to VEO 3.1.
Step 2: Upload your upscaled interior image.
Step 3: Use this prompt template:
Smooth cinematic camera movement through the interior space, subtle natural lighting changes, gentle camera pan from left to right, photorealistic architectural video, 4K qualityStep 4: Generate the video. VEO 3.1 will create a realistic camera movement through your static image, making it appear as though you're walking through the space.
Step 5: Download your video in MP4 format.
Note: VEO 3.1 works best with well-composed, high-quality upscaled images. The camera movement should feel natural, not jarring.
Prompt Customisation Tips
For Different Design Styles
Modern Minimalist:
Keep creativity low (0.2-0.3)
Emphasise clean lines in your prompt
Use lower HDR values for subtle lighting
Traditional/Classic:
Medium creativity (0.4-0.5)
Mention specific materials in prompt (velvet, mahogany, marble)
Slightly higher HDR for richer tones
Industrial/Urban:
Medium to high creativity (0.5-0.6)
Highlight textures like exposed brick, concrete, metal
Experiment with HDR for dramatic shadows
Finishing Touches
After upscaling, consider these optional enhancements:
Colour Grading: Use Photoshop or Lightroom to adjust colour balance, temperature, and tones to match your brand aesthetic.
Composition Refinement: Crop or adjust the composition for specific use cases (square for Instagram, wide for website headers).
Text Overlays: Add branding, property details, or design specifications for marketing materials.
Batch Processing: If you have multiple images, process them with consistent settings to maintain visual coherence across a project or portfolio.
Real-World Applications
Interior Designers
Enhance AI-generated concept renders or preliminary sketches to photorealistic quality for client pitches. Present multiple design options with professional-grade visuals without expensive 3D rendering services.
Architects
Upscale architectural visualisations for planning applications, investor presentations, or competition entries. Transform early-stage renders into presentation-ready materials.
Real Estate Agents
Improve property photography, especially for older listings or properties that photograph poorly. Create enhanced visuals for luxury property marketing materials.
Property Developers
Generate high-quality marketing materials for off-plan sales. Create realistic interior visualisations before physical show homes are built.
Content Creators
Produce premium interior design content for blogs, magazines, or social media. Create portfolio-quality images for design inspiration platforms like Pinterest or Instagram.
Virtual Staging Companies
Upscale virtually staged rooms to match the quality of professional photography. Offer premium tier services with ultra-high-resolution outputs.

