Ever need to visualise how an empty room could look with furniture? Whether you're staging a property, planning an office layout, or pitching design ideas to clients, AI can transform bare spaces into professional interior renders in minutes.
Before We Start: See the Results
This tutorial will show you how to take any photo of an empty interior and furnish it with AI while keeping the exact structure, angles, and architectural features intact. No 3D modelling required.
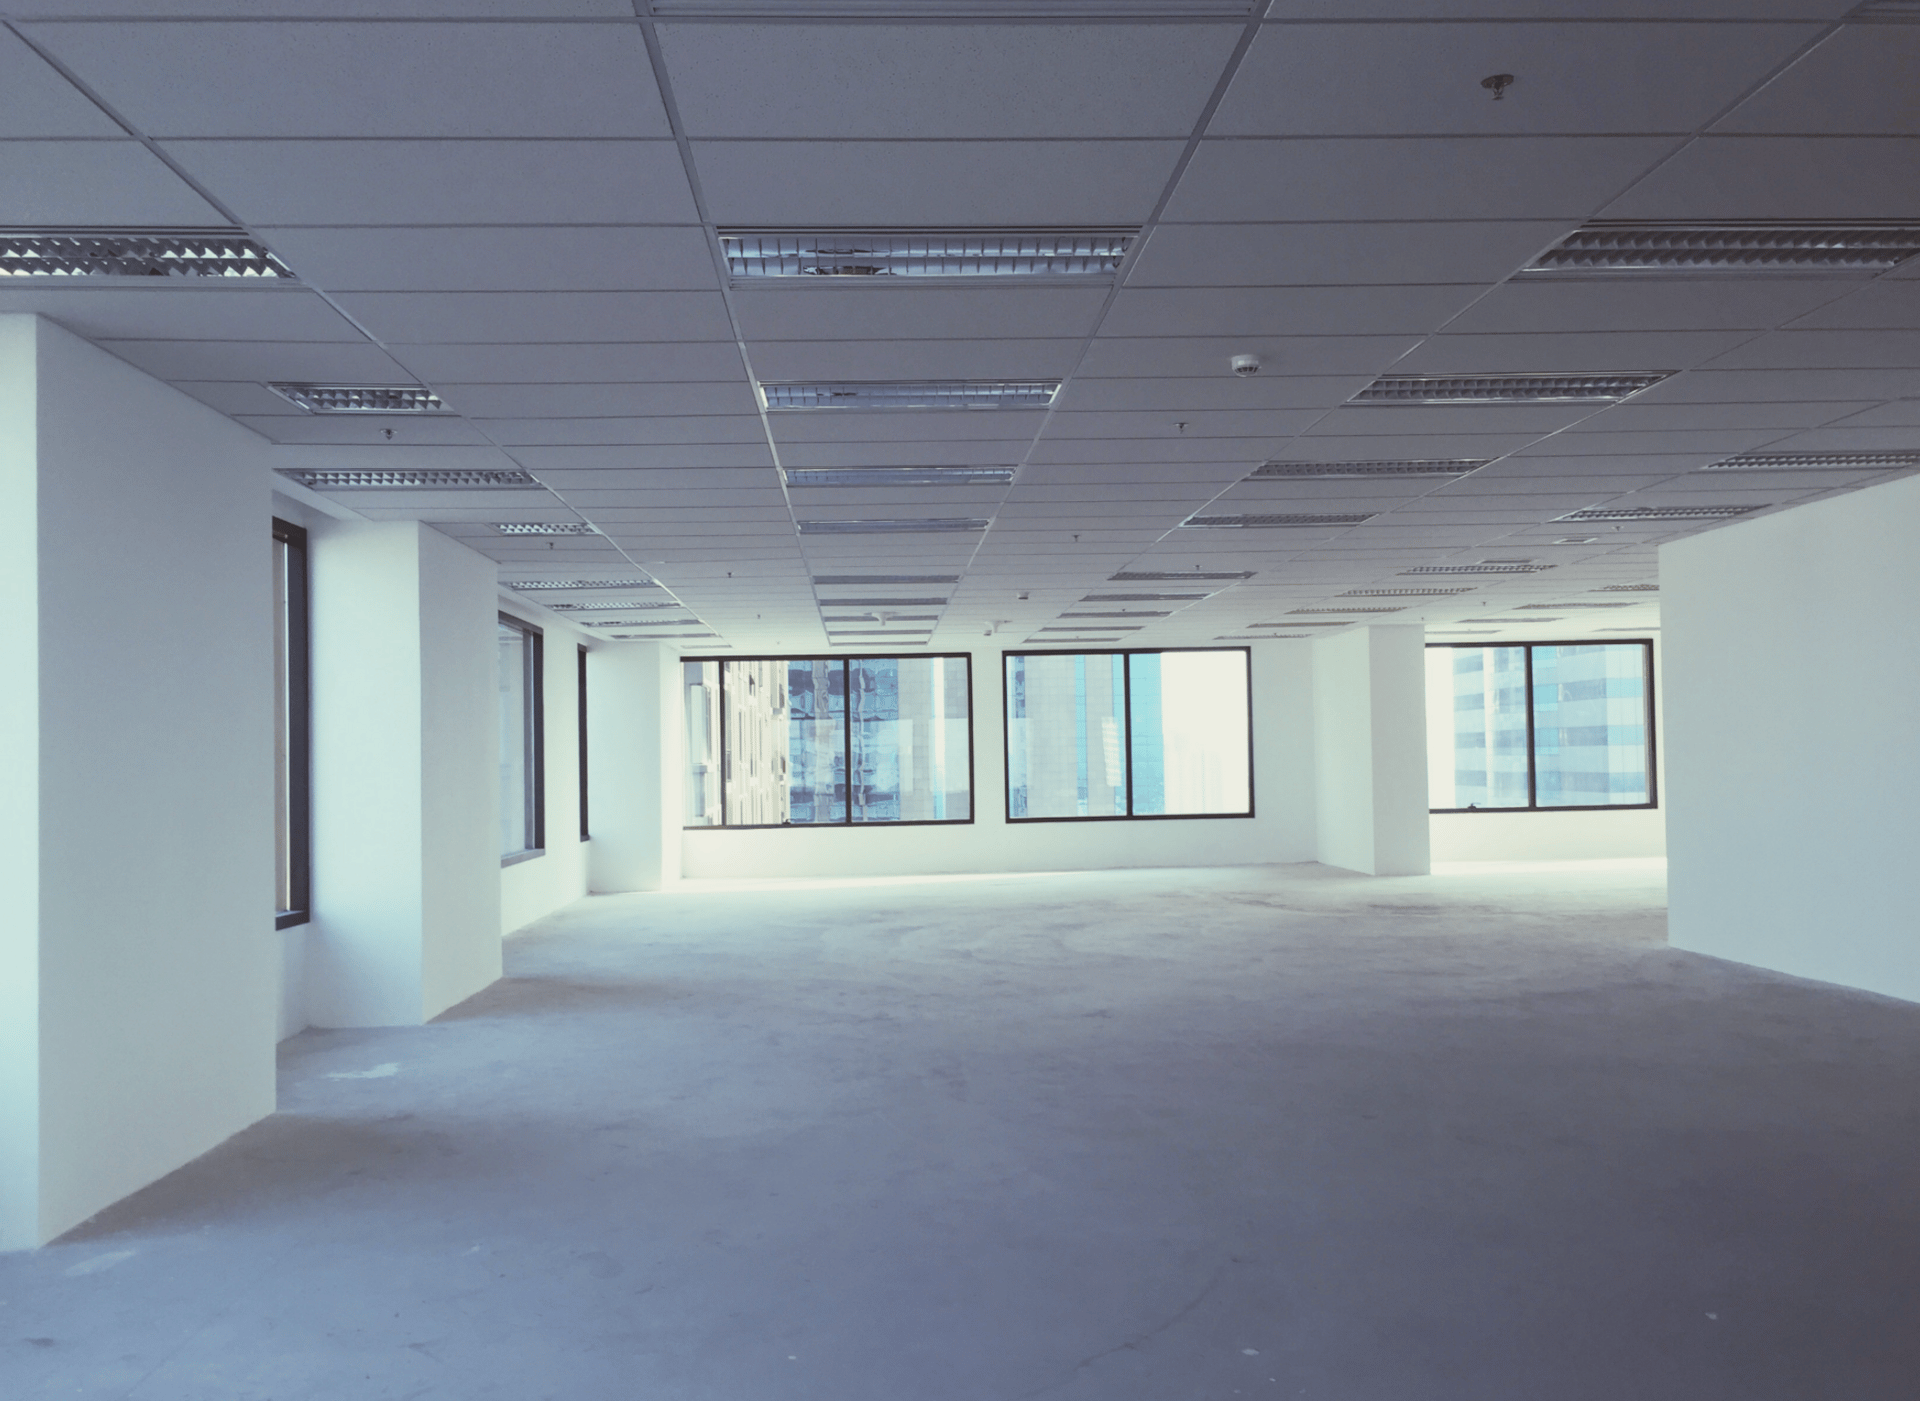
Before: Unfurnished interior
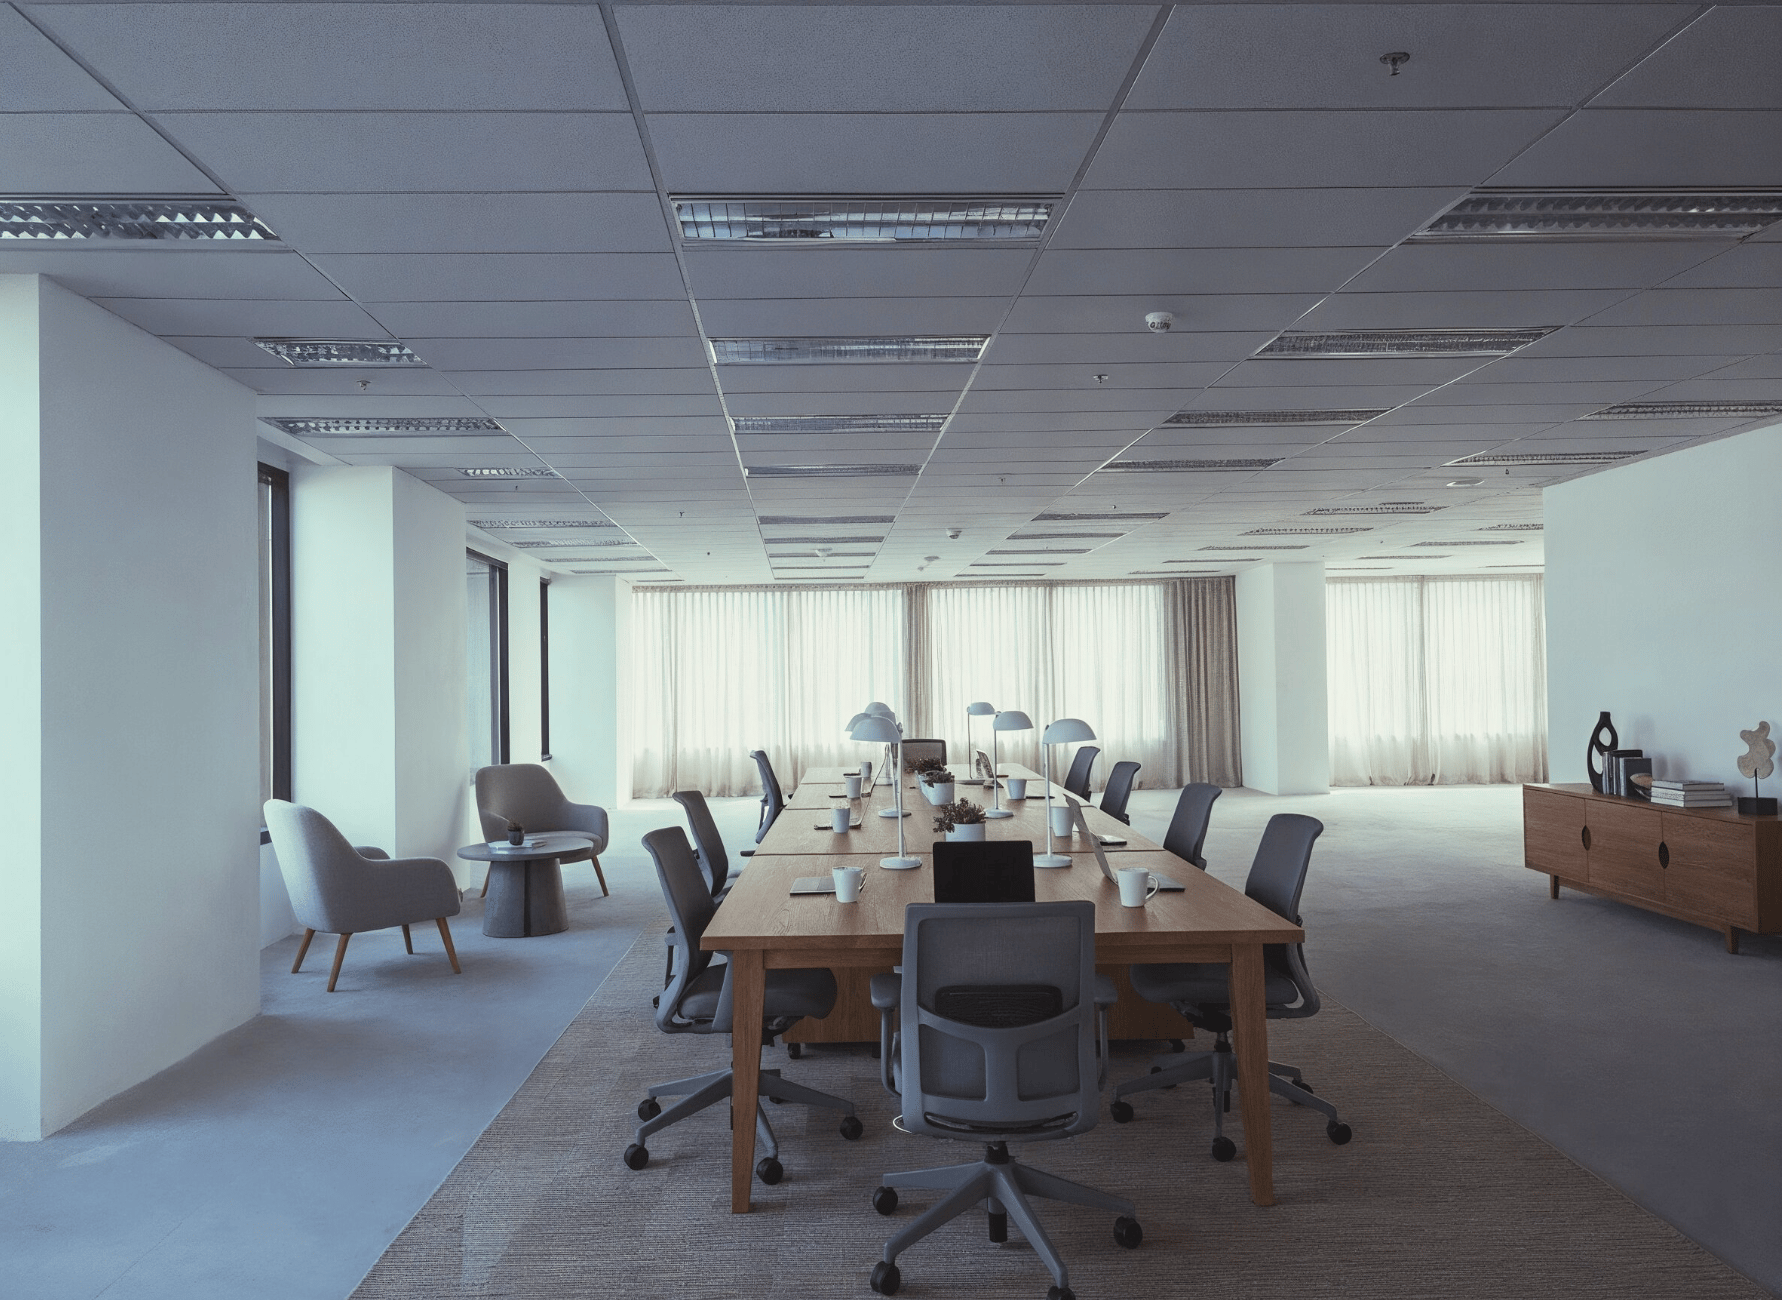
After: Fully furnished interior
What You'll Need
Image generation: Google's Nano Banana (via Gemini) - Free tier available
Optional upscaling: Magnific AI - Paid tool for enhanced quality
Optional video: Google's VEO 3.1 or Freepik - For animated walkthroughs
Prerequisites: A high-quality photo of your empty space. The better your starting image, the better your results. Pay attention to framing, lighting, and angles.
Step 1: Prepare Your Starting Image

Before: Unfurnished interior
Choose a photo of your empty interior space. For best results:
Use high-resolution images (the AI will maintain the quality)
Ensure good lighting and clear architectural details
Frame the shot how you want the final image to appear
The positioning and perspective will be preserved exactly
The quality of your input photo directly impacts your output. A well-lit, professionally framed shot will produce a professional result.
Step 2: Generate the Furnished Interior
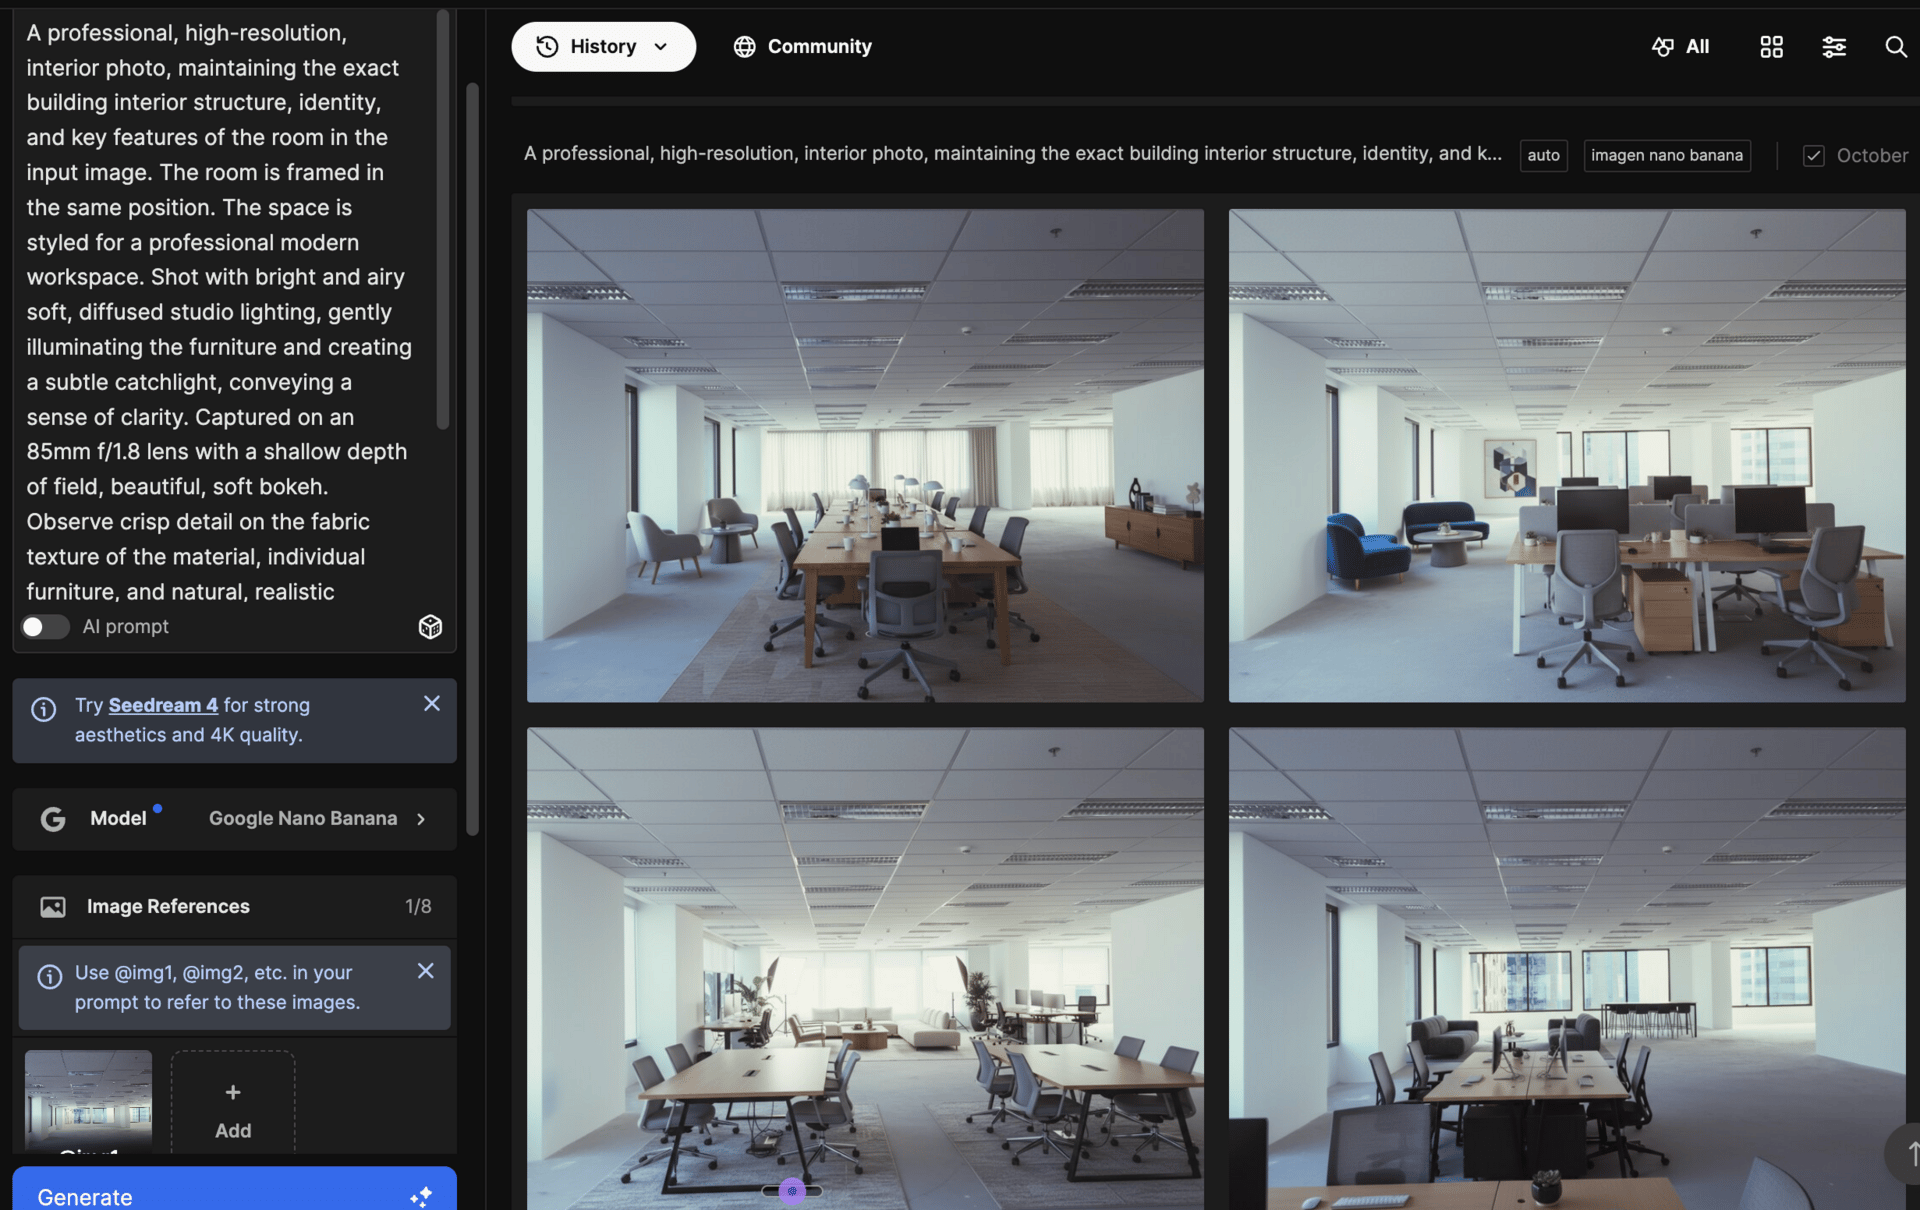
Head to Google's Nano Banana (accessible through Gemini). Upload your empty space photo and use this prompt:
A professional, high-resolution, interior photo, maintaining the exact building interior structure, identity, and key features of the room in the input image. The room is framed in the same position. The space is styled for a professional modern workspace. Shot with bright and airy soft, diffused studio lighting, gently illuminating the furniture and creating a subtle catchlight, conveying a sense of clarity. Captured on an 85mm f/1.8 lens with a shallow depth of field, beautiful, soft bokeh. Observe crisp detail on the fabric texture of the material, individual furniture, and natural, realistic material texture. The atmosphere exudes confidence, professionalism, and approachability. Clean and bright cinematic colour grading with subtle warmth and balanced tones, ensuring a polished and contemporary feel.Hit generate and wait for your furnished room to appear.
What this prompt does: It instructs the AI to preserve the exact structure of your room while adding furniture and interior styling. The technical photography details (lens, lighting, bokeh) ensure a realistic, professional look.
Customisation Tips:
Change the style: Replace "professional modern workspace" with:
"cosy residential living room with warm textiles"
"minimalist Scandinavian bedroom"
"industrial loft-style office"
"luxury hotel lobby aesthetic"
Adjust the lighting: Modify the lighting description:
"golden hour sunlight streaming through windows" for warm, natural light
"cool, bright fluorescent office lighting" for corporate spaces
"moody, dramatic accent lighting" for atmospheric renders
Change the camera style: Swap the lens specs:
"35mm wide-angle lens" for more expansive room views
"50mm lens with even focus" for balanced architectural shots
"24mm ultra-wide lens" for dramatic perspectives
Step 3: Refine Your Results
Review your generated image. Does it maintain the room's structure? Are the furniture placements logical?
If the AI altered the room structure too much, try:
Adding "exact same room layout" to your prompt
Being more specific about which architectural features to preserve
Reducing creative freedom by specifying furniture placement
Generate multiple variations until you're happy with the result.
Step 4 (Optional): Upscale for Maximum Quality
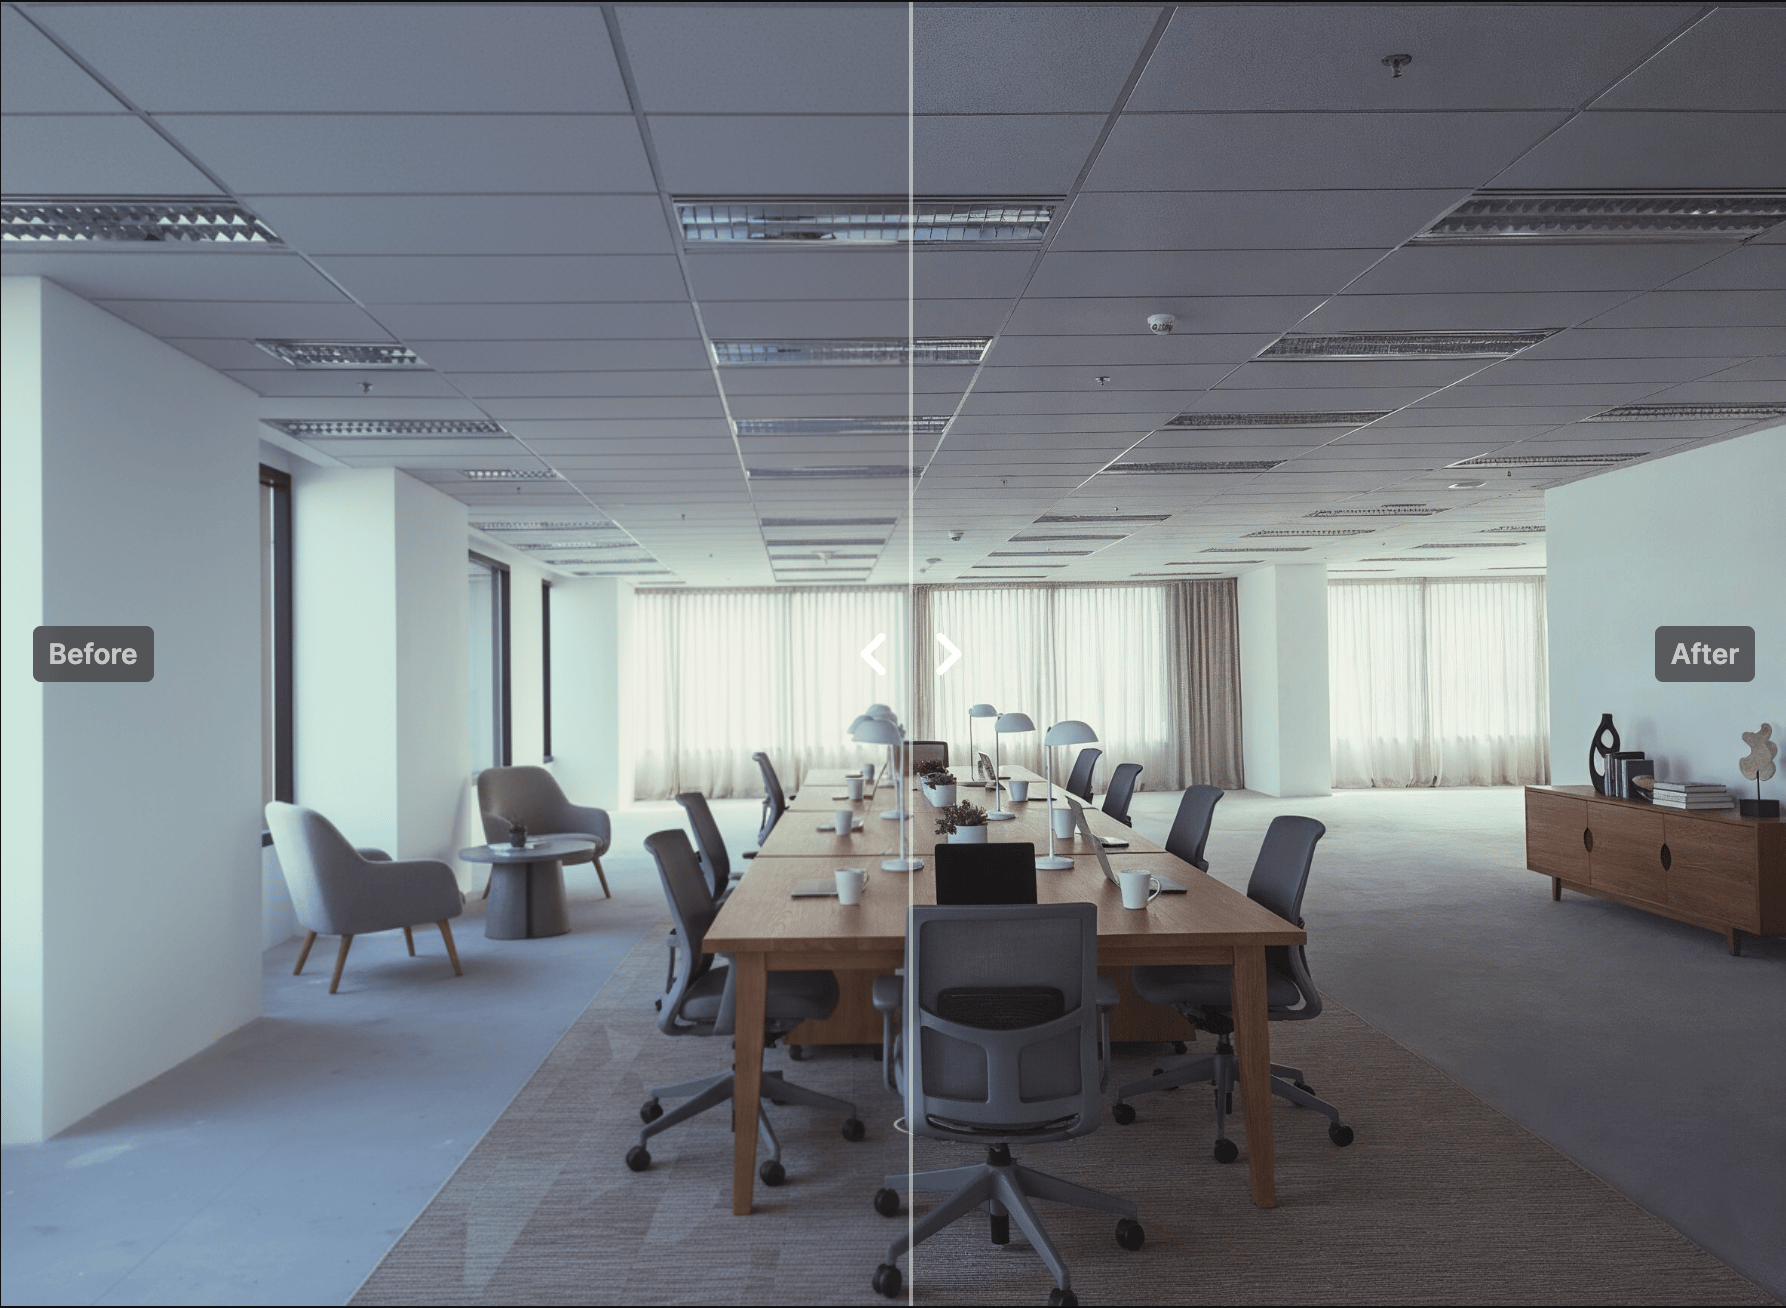
Once you have a result you love, enhance it with Magnific AI. This step dramatically improves detail while preserving the room's structure.
Why upscale? Image generators can sometimes produce soft details or inconsistent textures. Upscaling with precision mode adds crisp detail to furniture, textures, and materials without changing the layout.
Settings to use:
Upload your AI-generated interior image
Select Precision Mode (this is crucial - it prevents structural changes)
Set creativity to Low or Medium (higher values may alter the room)
Choose your target resolution (2x or 4x)
Hit enhance
Precision mode is the key here. Unlike standard upscalers that can "hallucinate" new details and change your image, precision mode enhances what's already there while keeping the exact structure intact.
Customisation Tips:
Adjust the creativity slider based on your needs:
Low (0-3): Maximum fidelity to your original image, minimal changes
Medium (4-6): Slight enhancement of textures and details
High (7-10): More creative liberty (use cautiously to avoid structural drift)
Step 5 (Optional): Create a Video Walkthrough
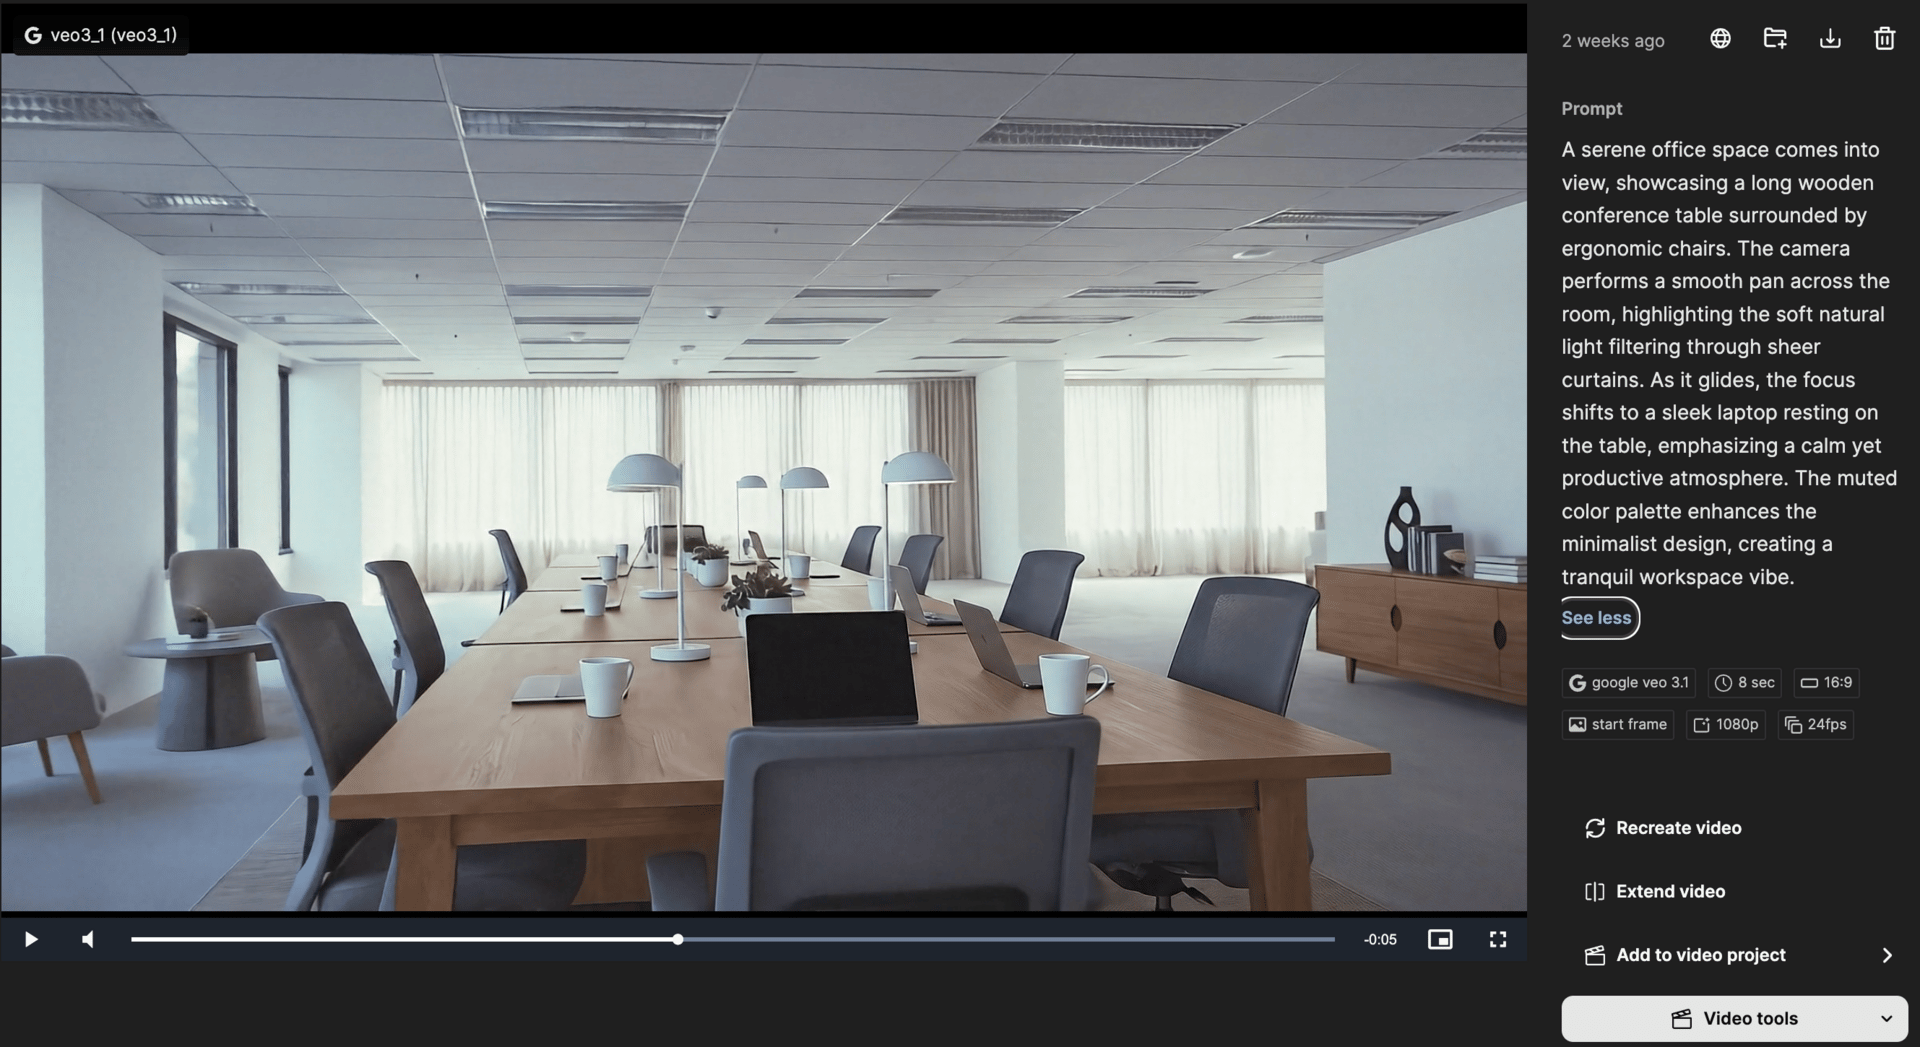
Want to take it further? Transform your static render into an animated walkthrough for presentations or social media.
Use Google's VEO 3.1 or Freepik to generate a video from your furnished interior image.
Video example here.
Example prompt for a smooth pan:
A spacious office conference room filled with natural light. The camera performs a smooth, sweeping pan across the long wooden table, showcasing the neatly arranged chairs and minimalist decor. Sunlight filters through sheer curtains, creating a warm, inviting atmosphere. The scene transitions to a close-up of a potted plant on the table, emphasising a serene and professional mood. Soft ambient sounds of distant conversations fill the air, enhancing the collaborative environment.Example prompt for a cinematic reveal:
A serene office space comes into view, showcasing a long wooden conference table surrounded by ergonomic chairs. The camera performs a smooth pan across the room, highlighting the soft natural light filtering through sheer curtains. As it glides, the focus shifts to a sleek laptop resting on the table, emphasising a calm yet productive atmosphere. The muted colour palette enhances the minimalist design, creating a tranquil workspace vibe.The prompt gave me sound effects and I was happy with the first generated video. No retakes needed.
These prompts include camera movement, atmosphere, and even sound design cues for VEO 3.1.
Customisation Tips:
Camera movements:
"Slow dolly forward" for dramatic reveals
"Gentle tracking shot along the wall" for showcasing wall features
"Static shot with rack focus" for highlighting specific furniture pieces
Atmosphere:
Describe lighting: "golden hour glow", "overcast soft light", "dramatic shadows"
Add environmental sounds: "gentle background music", "city ambiance", "quiet workspace hum"
Real-World Applications
This technique isn't just for fun. Here's how professionals use AI interior staging:
Real Estate: Stage empty properties for listings without the cost of physical furniture. Show potential buyers how spaces could look furnished.
Interior Designers: Pitch multiple design concepts to clients quickly. Generate 5 different furniture layouts in the time it would take to sketch one.
Office Planners: Visualise workspace configurations before ordering furniture. Test different desk arrangements, meeting room setups, or hot-desking layouts.
Architects: Show clients how their designs will look once occupied. Transform renders from sterile to lived-in.
Marketing & Content: Create lifestyle imagery for property developments, coworking spaces, or furniture brands without expensive photoshoots.
Finishing Touches
Want to polish your images further? Consider:
Colour grading: Use Lightroom or Photoshop to adjust colours and contrast
Add branding: Overlay logos for client presentations
Create variations: Generate multiple furniture styles for the same space to offer clients choices
Your Turn
Try this workflow with different interior spaces. Experiment with:
Different room types (offices, bedrooms, retail spaces, cafes)
Various design styles (modern, traditional, industrial, minimalist)
Lighting conditions (daytime, evening, dramatic)
Camera angles (wide shots, close-ups, corner perspectives)
The more you experiment with prompts, the better you'll get at controlling the AI's output. Share your results and let me know what works best for your use case.
Tools Used:
Image Generation: Google Nano Banana (via Gemini)
Optional Upscaling: Magnific AI (Precision Mode)
Optional Video: Google VEO 3.1 or Freepik

