Want a professional portrait headshot without booking a photographer?
Google's Gemini 3 Nano Banana Pro can generate realistic, professional-looking portraits in minutes.
Here's how to create headshots that look natural and polished.
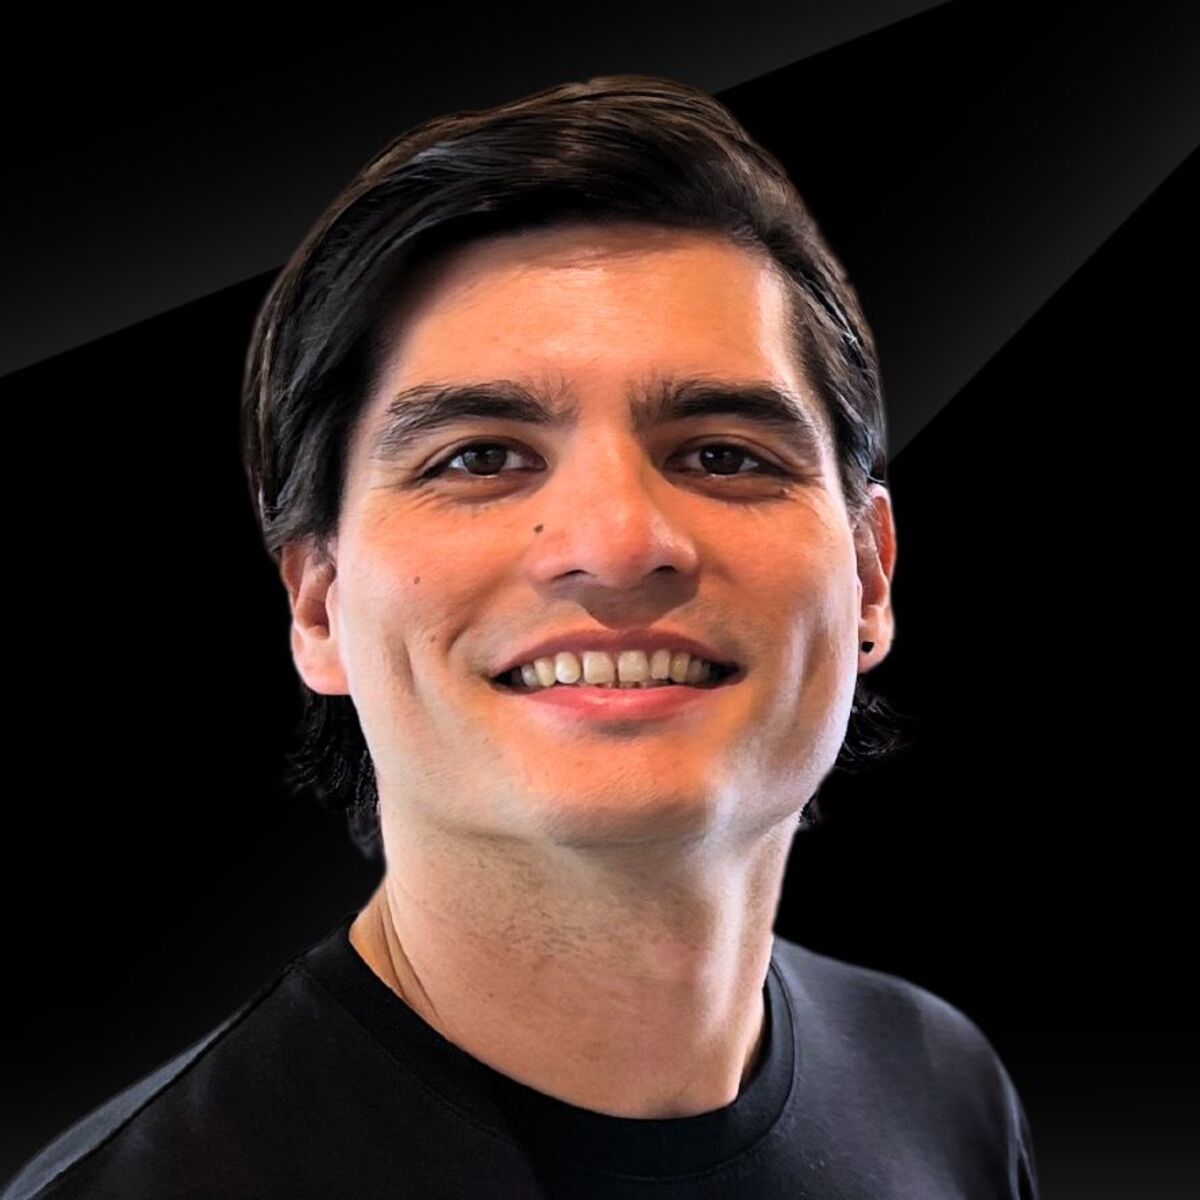
Before we begin here is the final result and the original image that was used

Nano Banana Pro 3.0 4K Image output

Original iPhone photo
What You'll Need
Access to Google AI Studio or the Gemini app (free tier available), or access via any AI tool with Nano Banana Pro. I personally use Freepik (not affiliated) all tutorial images will be referencing there but the process is the same.
A reference image of yourself for more personalised results
A clear idea of the style you want (business casual, formal, creative, etc.)
Step 1: Access Nano Banana Pro

Navigate to Google AI Studio or open the Gemini app. Look for the image generation option, which now uses the Nano Banana Pro model by default.
If using AI Studio, select "Create" → "Image" from the main menu.
Step 2: Write Your Headshot Prompt

Upload your reference image. I’d recommend selecting a high resolution photo that has good lighting so it can best capture the features of your face.
Next use this prompt for professional headshots:
Create an intimate, black and white close-up portrait of the subject. The pose features the subject leaning into the frame, hands clasped loosely near the mouth, conveying a sense of listening. The subject, a dark casual shirt
Camera & Settings: Shot on a Canon EOS R5 full-frame mirrorless camera with the Canon RF 85mm F1.2 L USM DS (Defocus Smoothing) lens. Exposure: Wide open aperture at f/1.2 creating an extremely shallow depth of field where the eyes are sharp but the ears and background melt into creamy bokeh; Shutter 1/250s; ISO 400. Lighting: Natural window light simulation using a 6x6ft scrim to diffuse a 1200W HMI light source coming from the left, creating soft, wrapping illumination with smooth transitions between light and shadow. Post-Processing: Color graded with a Silver Rich profile. Shadows are slightly lifted for a matte finish, with vignetting applied to the corners to draw focus to the center. The mood is pensive and intellectual.
You can adjust the prompt to suit your own needs. For example changing the hand positioning or the outfit.
Step 3: Generate Your Initial Image

Click "Generate" and wait 10-30 seconds for Nano Banana Pro to create your image. The model can produce up to 4K resolution image but will default to 1K.
I’d recommend testing the above prompt 1st and then tweaking until you get results you’re happy with. Note it is unlikely you will get the image right 1st time. You will likely have to generate the image multiple times until you find an image you like.
Review the result for:
Natural facial features and proportions
Appropriate lighting and shadows
Professional attire and setting
Overall composition and framing
Step 4: Refine With Specific Adjustments

If your first result isn't quite right, refine your prompt with specific details:
For better lighting:
Add "soft natural window lighting" or "studio lighting with subtle fill light"
Specify "golden hour lighting" for warmer tones
Try "even, flattering lighting" for balanced results
For better composition:
Specify "headshot framed from mid-chest up" or "tight crop on face and shoulders"
Add "rule of thirds composition" for professional framing
Include "shallow depth of field" for background blur
For better expressions:
Try "genuine smile," "confident expression," or "approachable and friendly"
Specify "direct eye contact with camera" for engagement
Add "relaxed, natural pose" to avoid stiffness
Customisation tips: Experiment with different backgrounds (office, outdoor, solid colours), clothing styles (business formal, smart casual), and lighting setups. Generate 3-5 variations to find the best option.
Step 5: Download and Use Your Headshot

Once satisfied with your result, download the image in high resolution. In other tutorials I’ve recommended upscaling with Magnific AI to increasing to further improve the image quality but because Nano Banana Pro outputs 4K images these are already great. You can export and resize wherever is needed.
For example on LinkedIn, the recommended size is 400x400 pixels minimum and 8mb in size, but starting with a high-resolution image ensures quality when cropped or resized.
Optional: Enhance with editing tools
If you want to make minor adjustments:
Use photo editing software to crop to the perfect frame
Adjust brightness or contrast slightly if needed
Consider upscaling if you need even higher resolution for print materials
Real-World Use Cases
For Job Seekers
Create multiple headshot variations to test which one gets better response rates on LinkedIn. Update your profile image seasonally to keep your presence fresh.
For Freelancers and Consultants
Generate consistent headshots across all professional platforms (LinkedIn, website, email signature) without the cost of a photo session.
For Companies and Teams
Create uniform headshots for team pages when professional photography isn't in budget. Maintain consistent style across all employee profiles.
For Personal Branding
Test different professional styles (corporate, creative, approachable) to see what resonates with your audience before committing to a photographer.